Sage50 troubleshooting
Restarting the connector
Restarting the connector
If your client can't restart for some reason, they can do the following:
Ensure the connector isn't running (if it's running, you'll see Sage50 Connector.exe in task manager) Double check that the connector isn't running Start the connector by running z%LocalAppData%\Codat\Sage50Connector.exez (either by browsing to the folder and double-clicking the .exe or by putting that in to Windows' Run prompt)
Finding the license key for an installed connector
If the Sage 50 Connector is not already in the foreground, open it by right-clicking on the Connector tray icon usually found in the bottom left of the screen and selecting 'Open Sage 50 Connector'.
Click the 'License' link.
This will show the product (your company product name as set in the portal (documented here) and the user's license key (which is the company ID as found in the Codat portal when creating the company).
Anti-virus software
Although we regularly submit our connector to be whitelisted by common antivirus vendors, sometimes it is possible for an antivirus to flag the connector as a false positive. Although the exact method of adding the connector to the local whitelist varies with each software, the general steps are the same.
The user will need to add the folder C:\Users\<YourUsername>\AppData\Local\Codat to the exclusion / whitelist setting of their antivirus software.
Whitelisting in Avast!
Some companies using Sage 50 and Avast! antivirus have reported experiencing difficulties when trying to sync data.
We have identified that Avast! sometimes blocks updates to the Sage 50 connector as it is incorrectly identifying the connector as a possible threat when updates are first released.
We recommend white-listing the folder where the connector has been installed to prevent Avast! blocking the connector from running after an update.
To white-list the connector folder, your users should:
- Open their Avast! Dashboard and click on Menu.
- Click on Settings.
- Go to General > Exceptions and click on 'Add Exception'
- Click on Browse
- Using the tree hierarchy, select the folder in which the connector has been installed (
C:\Users\YOUR_USERNAME\AppData\Local\Codat) and click OK.
Note: We recommend that the user selects the whole folder and not just individual connector locations. Double-check that the folder where the connector is located is displayed in the list and close the Avast! Dashboard
White-listing our offline connectors in Webroot SecureAnywhere desktop app
Some companies using our offline connectors and Webroot SecureAnywhere anti-virus have reported experiencing difficulties when trying to sync data.
We have identified that Webroot SecureAnywhere sometimes blocks updates to the Sage 50 connector as it is incorrectly identifying connectors as a possible threat.
We recommend white-listing the folder where the connector has been installed to prevent Webroot SecureAnywhere blocking the connector from running after an update.
To white-list the connector folder, your users should:
Open their Webroot SecureAnywhere Desktop app and click on Settings icon in the PC Security section.
Navigate to the 'Whitelisted Scripts' tab and click on Advanced Whitelist
Using the tree hierarchy, select the folder in which the connector has been installed (C:\Users\YOUR_USERNAME\AppData\Local\Codat) and click Select.
Note: We recommend that the user selects the whole folder and not just individual connector locations.
Double-check that the folder where the connector is located is displayed in the list and close the Webroot SecureAnywhere desktop app.
Company cannot be found
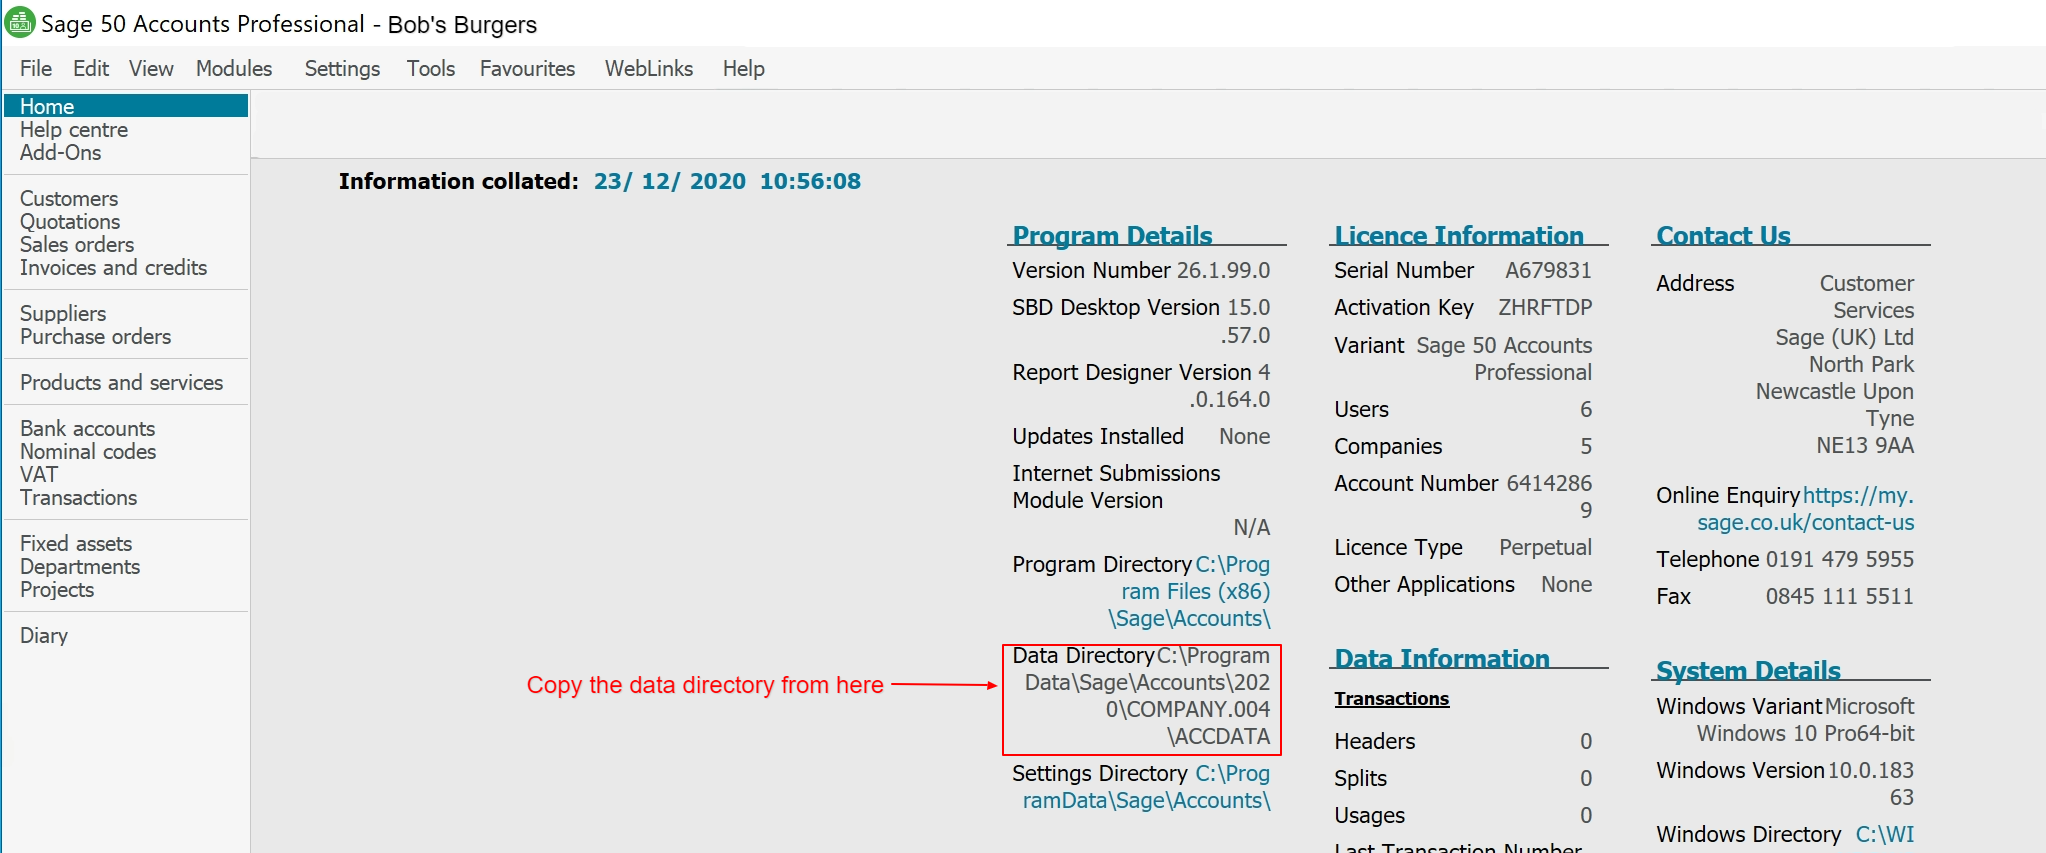
Once the offline connector is installed, you should be able to select the required Sage 50 company from the dropdown list. In some cases (for example, if your data is stored in a different place), you may need to perform the following steps to locate your company.
- Log into your Sage 50 application and select the company you would like to sync data for. Navigate to Help > About, then find and copy the data directory information for this company.

- Return to the connector and paste the copied data directory information in the data directory field. Enter the username and password associated with that company and click the "Link company and perform sync" button.

- A popup with the company details will appear. If the data is correct, press the "Confirm" button to confirm. Your company will begin syncing.